
Your Ultimate Guide to Setting Up a Compost Bin
Setting up a compost bin is more than just a garden project—it's a transformative decision for your home and the planet. This isn't about adding another chore to your list; it's about unlocking the power to turn everyday kitchen scraps and yard trimmings into 'black gold'—a nutrient-rich superfood for your plants. Imagine shrinking your landfill waste while creating free, all-natural fertilizer. It’s a genuine win-win, and you have the power to make it happen.
Why You Absolutely Should Start Composting
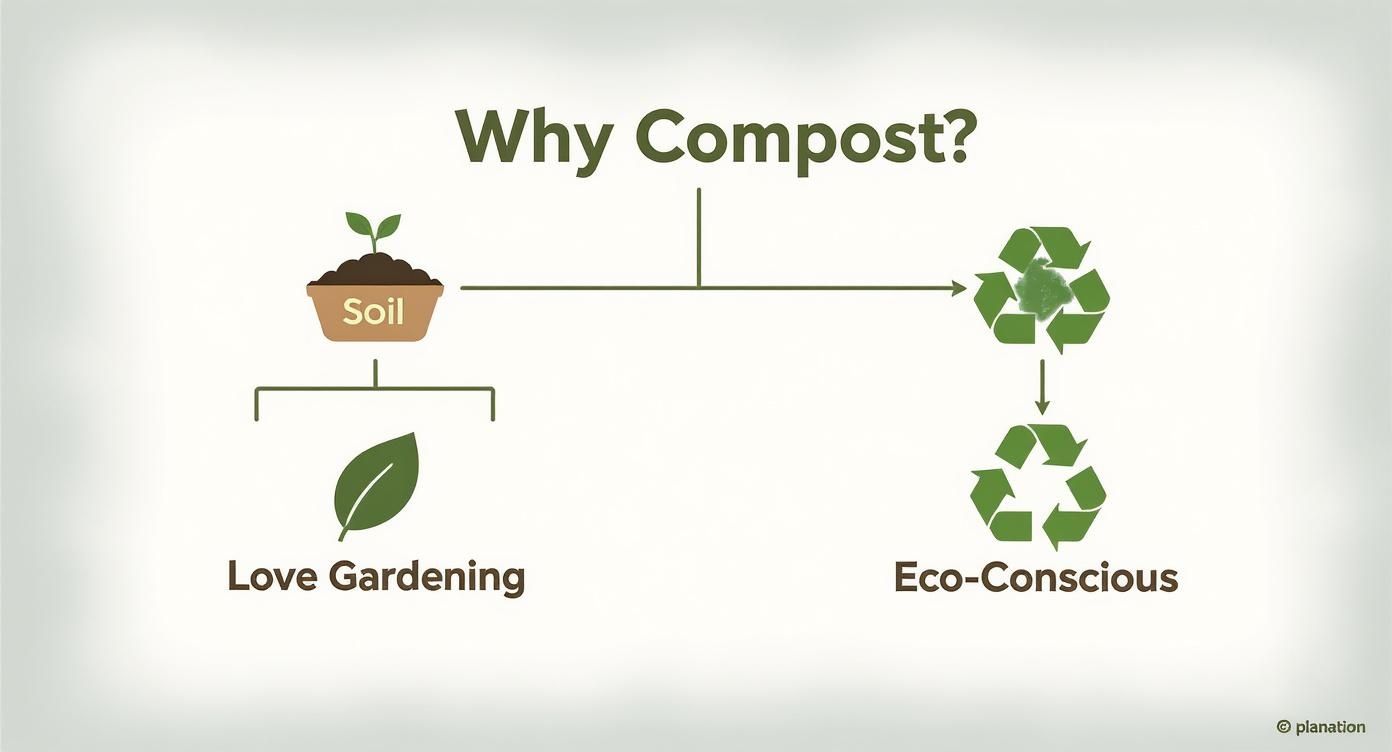
Before you start hunting for the perfect spot in your yard, let's connect with the "why." Composting is so much more than a trick to empty your trash can less often. It’s a profound act of plugging into a natural cycle that genuinely benefits your home, your garden, and the planet. There is a deep, primal satisfaction in watching a pile of what was once 'waste' transform into dark, earthy, life-giving humus. You're not just getting rid of trash; you're creating value from scratch.
This 'black gold' is a powerhouse for your garden. It’s teeming with essential nutrients and beneficial microorganisms that bring your soil roaring back to life. When you work this finished compost into your garden beds, you're fundamentally improving the soil structure, boosting its ability to hold moisture, and completely eliminating the need for expensive, store-bought chemical fertilizers. Your plants will thank you for it with more vibrant growth and healthier yields.
The Bigger Environmental Picture
The ripple effect of your small compost pile extends far beyond your backyard. When organic matter like banana peels and coffee grounds is sealed in a plastic bag and buried in a landfill, it’s cut off from oxygen. As it breaks down anaerobically, it releases methane, a greenhouse gas over 25 times more potent than carbon dioxide at trapping heat in the atmosphere.
By choosing to compost at home, you are personally intervening. You're keeping that waste out of the landfill and directly cutting down on those harmful emissions. It’s one of the most practical, high-impact steps you can take to how to reduce environmental footprint in a truly meaningful way.
"A simple compost pile is a powerful tool. It enriches soil, sequesters carbon, and closes the loop on our food system, turning what was once 'waste' into a valuable resource for future growth."
More Than Just Dirt
The secret is out, and people are catching on. The global compost market hit nearly $8.15 billion in 2024, a testament to how much value people are seeing in this simple, powerful practice. This isn't just a niche hobby anymore; it’s a major part of the global push for smarter, more sustainable waste management.
Composting is also a cornerstone of modern sustainable landscaping practices that are creating healthier, more resilient yards. You will save money on soil and fertilizers while doing your part for the local ecosystem. It’s a choice that pays dividends.
Choosing the Right Compost Bin for Your Home
Picking the perfect compost bin isn't about finding the single "best" one on the market. It’s about finding the one that fits your life. The right choice comes down to three things: the space you have, the amount of organic waste you create, and frankly, how hands-on you want to be.
This is a personal decision, shaped by your daily habits and your composting ambitions. The chart below is your roadmap to finding the path that makes the most sense for you.
Whether you’re an avid gardener dreaming of black gold or simply someone who wants to live a little more sustainably, the perfect composting solution is waiting for you.
Stationary Bins: The Suburban Staple
When most people envision a compost bin, the classic stationary bin is what comes to mind. These are typically large, plastic containers with an open bottom, designed to sit directly on the ground in your yard.
They're a fantastic choice for families who generate a steady mix of yard trimmings and kitchen scraps. Their enclosed design does a great job of holding in heat and moisture to accelerate decomposition. Plus, they keep critters like raccoons out. The only real work is harvesting the finished compost, which you can easily shovel from a convenient door at the base.
Compost Tumblers: For Patios and Small Spaces
Living with less space, like on a patio or a small deck? A compost tumbler will be your best friend. These are sealed barrels mounted on a stand, allowing you to effortlessly turn a crank or spin the entire unit to mix the contents.
This constant mixing and aeration is the key to their incredible speed. You can get finished, usable compost in just a matter of weeks. They’re clean, completely sealed, and you don’t have to get your hands dirty with a pitchfork. The only trade-off is their smaller capacity; they can also get heavy and tough to turn once they're full.
It's no surprise that home composting is catching on. The global compost bin market was valued at around $500 million in 2025 and is projected to grow by 7% each year through 2033. This isn't just a trend; it's a fundamental shift toward more sustainable living. You can see the full breakdown by reading the Market Report Analytics.
DIY and Alternative Options
If you're the handy type or just have a lot of yard to work with, building your own bin is a brilliant, budget-friendly route. You can easily construct a simple, open-air system from old pallets or wire mesh. These can be built as large as you need, making them perfect for serious gardeners with a ton of leaves and grass clippings.
Then there's vermicomposting—a totally different approach that uses worms to do the work. The worms live in a small, contained bin and rapidly break down your food scraps. It’s incredibly efficient and can even be done indoors, making it a game-changer for people in apartments. If that sounds intriguing, you must check out our guide on what is vermicomposting.
Compost Bin Comparison at a Glance
Feeling a bit overwhelmed by the options? Don't be. This quick comparison chart breaks down the common bin types to help you find the best fit for your home and garden.
| Bin Type | Best For | Pros | Cons |
|---|---|---|---|
| Stationary Bin | Suburban homes with yard space; steady stream of kitchen and yard waste. | Large capacity; retains heat and moisture well; excellent pest protection. | Slow to produce compost; harvesting finished compost can be difficult. |
| Compost Tumbler | Patios, decks, or small yards; people wanting fast results with less effort. | Very fast decomposition; clean and fully enclosed; easy to aerate. | Smaller capacity; can be heavy and difficult to turn when full. |
| DIY Bin | Large yards with lots of waste; budget-conscious or DIY-savvy individuals. | Low cost; can be customized to any size; handles large volumes. | Can be messy; may attract pests if not managed well. |
| Vermicomposting | Apartments or homes with no outdoor space; processing kitchen scraps only. | Extremely efficient; produces nutrient-rich castings; can be done indoors. | Small capacity; can't handle yard waste or certain food scraps. |
Each style has its own strengths. The best one for you is simply the one that aligns with your space, your waste, and your composting goals.
Finding the Perfect Spot for Your Compost Bin

Your composting success hinges on one of the first decisions you make: where to put the bin. This isn't a detail to gloss over; the location you choose is about more than just aesthetics. A good spot can make all the difference in how quickly and efficiently your pile breaks down, transforming composting from a chore into a seamless and satisfying habit.
Think of it like finding the right place for a new plant. You need to consider sun, water, and accessibility. Too much scorching sun can bake your compost pile dry, bringing the whole process to a screeching halt. But a spot that’s always in the shade might keep things too cool and damp. The sweet spot is an area with partial shade, which helps maintain the ideal temperature and moisture levels.
The Foundation of Good Compost
Whenever possible, set your compost bin directly on bare soil or grass. This is one of the most powerful tips for success because it’s a total game-changer. It essentially rolls out the welcome mat for all the essential decomposers—earthworms, beneficial bacteria, and fungi—to migrate from the ground right up into your pile. These microorganisms are the engine of your compost system, and giving them easy access gets things cooking from day one.
Good drainage is also non-negotiable. You’re aiming for the moisture level of a wrung-out sponge, not a soggy swamp. If you place your bin in a low spot where rainwater tends to pool, you’re asking for a smelly, anaerobic mess. Find a level patch of ground that drains well.
Convenience Is Key to Consistency
Let’s be realistic. If your compost bin is a long trek to the back of the yard, how often will you really use it, especially when it’s cold or raining? When you’re setting up a compost bin, design for success by thinking about the path of least resistance from your kitchen.
A great location is convenient but not too close. Aim for a spot that is easy to reach with a bucket of kitchen scraps but far enough from patios or windows to avoid attracting any curious pests to your living space.
Finally, think about your future self. You'll need to get a hose over there to moisten the pile, and you’ll want enough room to comfortably turn the contents with a pitchfork. Trust me, I've learned that lesson the hard way!
Here’s a quick checklist to help you scout out the perfect spot:
- Partial Sun: A balance of sun and shade keeps temperatures stable.
- Good Drainage: Steer clear of any areas where water puddles after it rains.
- Soil Contact: Placing it right on the ground is an open invitation for helpful microbes.
- Convenient Access: Make the trip from the kitchen short and easy.
- Water Source Nearby: Having a hose within reach is a lifesaver.
- Ample Workspace: Leave yourself a few feet of elbow room around the bin.
Choosing the right location from the get-go makes the whole process feel natural and effortless, making it that much more likely you’ll stick with it for the long haul.
Building a Thriving Compost Pile Layer by Layer
This is where the magic truly begins. You’ve picked your bin and found the perfect spot; now it’s time to build a compost pile that practically runs itself. Forget complicated math or strict ratios. The real secret to a healthy, happy compost pile is a simple layering method that balances two types of materials: "greens" and "browns."
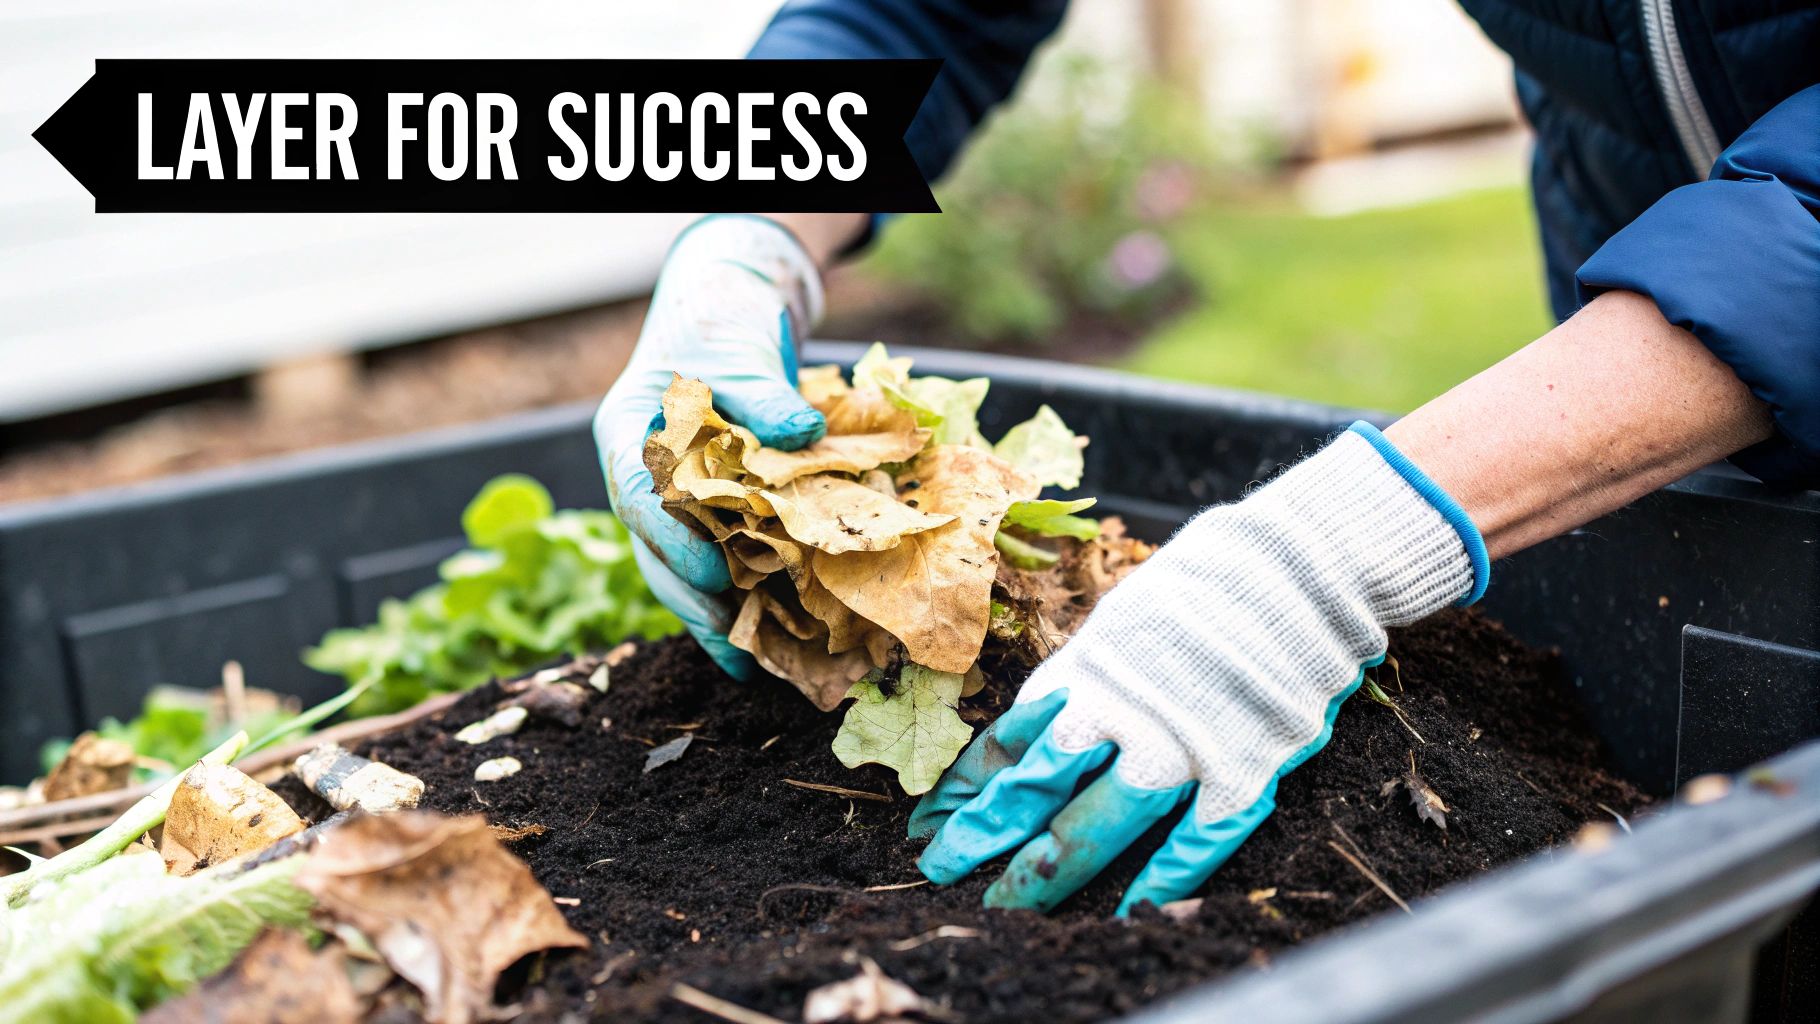
Think of it like making a lasagna. You're creating distinct, alternating layers that work together to become something incredible. Your "greens" are the nitrogen-rich ingredients—the fresh stuff that provides the protein to fuel the microscopic army doing the hard work. On the other hand, your "browns" are carbon-rich materials, which give those same microbes the long-lasting energy they need to break everything down.
Kickstarting Your Compost With a Solid Base
The very first layer you put in your bin is critical for its long-term health. Before you even think about tossing in food scraps, you must build a foundation that ensures good airflow from the bottom up. Trust me, a soggy, compacted base is a recipe for a smelly, slow-moving disaster.
Start by laying down a thick, fluffy layer of coarse "browns," aiming for about 4-6 inches deep. This isn't just filler; it's a structural layer meant to be bulky and airy.
- Twigs and small branches: These create essential air pockets that prevent compaction.
- Wood chips or shredded bark: Fantastic for adding structure and they decompose slowly.
- Strips of cardboard or crumpled newspaper: A great way to add carbon and bulk right from the start.
This base acts like a sponge, soaking up any excess moisture that trickles down and preventing the bottom of your bin from turning into a swamp. It's a simple first step that pays huge dividends.
A great pro-tip for setting up a new compost bin is to toss in a scoop or two of finished compost or even just some regular garden soil. Think of it as an "activator"—it inoculates your new pile with a healthy population of the beneficial bacteria and fungi needed to get things cooking quickly.
The Art of Alternating Greens and Browns
With your base in place, you can start adding your kitchen scraps and yard trimmings. The goal is simple: alternate layers of greens and browns, just like that lasagna. A good rule of thumb is to add a layer of browns that’s roughly two to three times thicker than your green layer. This isn't a precise science, so don't get out a ruler—just eyeball it.
For instance, after you add a small bucket of kitchen scraps (your greens), cover it completely with a layer of dried leaves or shredded paper (your browns). This one habit is your number one defense against pests and odors. A cap of brown material effectively seals in smells and makes your pile completely uninteresting to fruit flies and other critters.
Getting this balance right at home is a massive win for the environment. Research shows that food waste is a primary source of methane in landfills, accounting for a staggering 58% of these emissions. Composting it properly prevents that.
To make things crystal clear, let's break down what falls into each category.
Your Guide to Greens and Browns in Composting
Here’s a straightforward table to help you identify what to use for your nitrogen-rich 'green' layers and your carbon-rich 'brown' layers. Mastering this balance is the key to fast, odor-free compost.
| Material Type | Examples | What It Provides |
|---|---|---|
| Greens (Nitrogen) | Fruit and vegetable scraps, coffee grounds, grass clippings, eggshells. | Protein and moisture to fuel microbial growth and heat up the pile. |
| Browns (Carbon) | Dried leaves, twigs, shredded cardboard, newspaper, sawdust, pine needles. | Energy for microbes, structure for airflow, and absorption of excess moisture. |
Remember the golden rule: always finish with a brown layer on top. This keeps your compost tidy, odor-free, and ready for your next addition of scraps. This simple layering habit is truly the cornerstone of successful, hassle-free composting.
How to Keep Your Compost Healthy and Odor-Free
https://www.youtube.com/embed/swLkA1cHJ4Y
Once you’ve layered your greens and browns, you can mostly sit back and let nature do its thing. But a little bit of upkeep will supercharge the process and ensure your compost always smells earthy and rich—not sour.
A healthy compost pile is a living ecosystem. Your main job is to provide the two things it needs most to thrive: air and water. Think of it less as a waste bin and more as a powerful decomposition machine that you get to fine-tune.
Turning Your Compost Pile is Key
Think of turning the compost pile as fluffing a pillow. You're simply introducing oxygen, which is absolutely essential for the aerobic bacteria that do all the hard work. Without enough air, anaerobic bacteria can take over, slowing everything down and creating that nasty rotten-egg smell nobody wants in their backyard.
Turning your pile does a few critical things all at once:
- It aerates the pile, delivering a fresh blast of oxygen to every nook and cranny. This keeps the good microbes happy and working hard.
- It distributes moisture evenly, moving damp material from the core out to the drier edges and vice-versa.
- It mixes everything together, making sure fresh kitchen scraps and yard waste get worked into the hot center of the pile where decomposition happens fastest.
So, how often should you do it? For a standard stationary bin, giving it a good turn with a pitchfork or a compost aerator once every 1-2 weeks is perfect. If you have a tumbler, it's even easier—just give it a few spins every 2-3 days.
You'll know it's working when you turn it on a cool morning and see steam rising from the center. That’s the beautiful sign of a healthy, hot compost pile!
As you get into a rhythm, you'll find ways to make collecting scraps easier. Using the right kind of bags can make a big difference. Check out our guide on compostable bags for your compost bin to learn more.
Getting the Moisture Level Just Right
The other secret to incredible compost is moisture. The ideal consistency is like a wrung-out sponge: it should be damp to the touch, but not dripping wet if you squeeze a handful.
If it’s too dry, the decomposition process will slow to a crawl. If it’s too wet, you’ll end up with a soggy, stinky mess because there’s no oxygen for the good bacteria.
During long stretches of hot, dry weather, your pile might need a drink. Simply give it a light spray with the hose as you turn it to distribute the water evenly.
On the other hand, if a week of heavy rain has turned it into a swamp, the fix is just as simple: add more "browns." A few handfuls of shredded cardboard, dried leaves, or sawdust will soak up that extra moisture and get things back in balance.
Troubleshooting Common Compost Problems
Even the most seasoned composters run into issues now and then. Don't worry—the fixes are almost always simple.
- Bad Smells: If your pile smells sour or like ammonia, it's a classic sign of too many nitrogen-rich "greens" and not enough carbon-rich "browns." The quick fix is to mix in a generous layer of shredded leaves or cardboard and give the pile a good turn to get air flowing.
- Pests: Raccoons and other critters are usually drawn to exposed food scraps. The best defense is to always bury your kitchen waste deep in the center of the pile and cover it with a thick layer of browns. If fruit flies are buzzing around, this guide on how to control fruit flies has some great, simple solutions.
- No Heat: A cold pile is an inactive pile. It probably needs more "green" material to fuel the microbial party. Try adding some fresh grass clippings or a bucket of vegetable scraps, turn it all together, and it should heat up in a day or two.
Common Questions About Setting Up a Compost Bin
Jumping into something new always brings up a few questions. When it comes to composting, getting clarity upfront can make all the difference, empowering you to feel confident and keep things running smoothly right from the start.
Let's tackle the big one first.
Will My Compost Bin Attract Rats?
This is the number one concern, and it's a valid one. But the short answer is no, it shouldn't—as long as you're smart about it. Critters like rats and raccoons are after an easy meal. Your job is to make your compost bin the least interesting restaurant on the block.
The trick is to always bury your kitchen scraps deep inside the pile. Don't just toss them on top. Dig a little hole, dump them in, and then cover them with a thick layer of "browns" like dried leaves, straw, or shredded cardboard. Out of sight, out of mind (and out of smell) for any unwanted visitors.
How Long Does It Really Take to Get Compost?
The timeline question! The answer truly depends on your setup and how involved you are. There’s no single magic number.
- A "hot" compost pile that you're actively managing—turning it regularly and keeping the green/brown ratio just right—can reward you with finished compost in as little as 4 to 6 weeks.
- If you take a more hands-off, "cold" composting approach, you're looking at a longer timeline, perhaps six months to a year. Tumblers often speed things up compared to stationary bins.
What Should I Do If My Compost Starts to Smell Bad?
A stinky compost pile is just a signal that something's off-balance, but don't panic! It's almost always a quick and easy fix. If you're getting a sour, rotten, or ammonia-like smell, it's a classic case of too many "greens" (nitrogen) and not enough air.
The solution is simple: add more "browns." Grab a bunch of carbon-rich materials like torn-up newspaper, sawdust, or wood chips and mix them in. Then, grab a pitchfork or a compost aerator and give the whole pile a good turn to get oxygen flowing again. That's it. You've just reset the balance and the smell will disappear.
It's amazing to see how many people are embracing this. The global household composter market was valued at a whopping $2.195 billion in 2025, which proves this isn't a niche hobby anymore. Indoor models are booming in cities, showing you really can make it work anywhere. You can dig into more stats about the rise of home composting at archivemarketresearch.com.
Can I Compost in the Winter?
Absolutely. Your compost pile won't be nearly as active when the temperature drops, but the microbes don't just pack up and leave. Things will slow down significantly, but they don't stop completely.
Think of winter composting as banking your materials. Keep adding your kitchen scraps all season long. When spring finally arrives and things warm up, your pile will have a massive head start and will roar back into high gear.
Here at terravera, we're passionate about making sustainable habits feel simple. Our compostable bags are designed to make collecting those kitchen scraps clean and hassle-free, giving you a perfect start on your journey to creating rich, homemade compost. Ready to get going? Check out our products at https://www.myterravera.com.